Showing posts with label artsandcrafts. Show all posts

Friday, April 19, 2013

How To Make Eco-Friendly Gift Bows

Eco-Friendly Gift Bows Out of Recycled Magazines


I don't know about you, but I absolutely love wrapping presents. I'm actually kind of a control freak, because every gift has to be wrapped perfectly which makes it difficult when Sidney wants to help, but we get through it. 

A neat idea I came across a couple of years ago was how to make your own eco-friendly gift bows using recycled magazines. What I really like about them is that you can choose your own image whether it's a funky cartoon, a beautiful garden or a serene blue sky and turn it into a one-of-a-kind bow! 

To make it:


1. Select a page from your old magazine, and cut it into nine strips. Three large, three medium, two small and one really small one. 


2. Turn the ends of the strip in to the center, so that it either makes a round, or pointed end. Dab a bit of glue in the middle to keep it in place. Do this to all eight of your strips, leaving out the smallest.


3. With the smallest peace, fold it into a cylinder. Glue it in place.


4. Once all your strips are turned in, layer them on top of one another like so, keeping the large pieces together, medium together and small together.


5. After you've layered them all on top of one another you can staple them in the center. My stapler is too big to staple the small, cylinder piece on top so I typically just glue it on afterwards. 


And there you have it! A unique gift bow! 


Thanks, 

Saturday, March 30, 2013

Drawings By Me

Drawing used to be one of my favourite hobbies. Throughout elementary, and then junior high I spent almost all of my free time drawing. In high school though, I hated art class. I hated being told what to draw and paint, and how to do it. There was no freedom in it and so my love of art dwindled away. 

During last summer though I got back into drawing through an art program and came out with some pretty decent stuff. I'm not saying I'm some brilliant artist, but considering I haven't done much drawing since 2006 I would like to think that I did alright.

Corvette drawing - April 2012

Mia Farrow - May 2012
Frank Sinatra - May 2012

James Cagney - June 2012

Jack Nicholson - June 2012

Sidney age 2 - July 2012

Thanks, 

Wednesday, March 13, 2013

DIY Super Simple & Cute Bracelet

How to Make a Cute Beaded Bracelet


Materials:

I'm a huge fan of hemp because it's eco-friendly, natural, vegan, durable and nice looking. However, any type of cord can be used for this as long as it's about 1mm thick.

And the fun part - selecting the beads you want to use! Keep it clean and simple with pretty white beads, or mix it up with some funky colours, shapes and sizes!

Instructions:

1. After you have selected your cord, and the beads you want to use, it's time to decide on how long you want it. The way I do this is by wrapping the cord around my wrist. I wrapped mine around my wrist 18 times.


2. Next, you start putting your beads onto the cord. It doesn't matter how many you put on, if you need to put more on after you start you can. I did mine 5 seed beads, 1 blue, 7 seed beads, 1 blue, repeat.  I find that making it too even makes the larger beads cluster once you've wrapped it around your wrist to wear.


3. Now that your beads are on, you can start tying knots between them. The space between the beads is up to you. I seem to like tying the knots 2cm apart. I tie the knots right up against my larger beads though. This part can be time consuming depending on how long your cord is, but how easy is tying knots? Right?


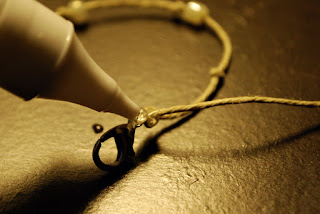
4. Once your beads are all secured in between your knots, you can attach your lobster claw on one end, and a little loop on the other end - both tied off with double knots. To make sure they don't come undone I recommend adding some fabric adhesive. I also like to twirl the excess cord around a couple times, then adding more fabric adhesive. But you really don't have to.


And there it is, a cute bracelet. Or you can use it as a necklace or anklet as well. Mix it up!

Or if you don't enjoy making your own jewelry but like the look of these bracelets, you can purchase them at my shop Amity Arts and Crafts.

Thanks, 

Sunday, January 6, 2013

How To Make A Square Knot Hemp Bracelet

Making Square Knot Hemp Bracelets Are Easy

A simple square knot, and a bracelet for Sidney!
Hemp braclets are pretty, eco-friendly, vegan and very easy to make! Depending on how complicated the pattern is, how many beads you put on or your skill level they can either take a few minutes, or be more time consuming.

If you're up for it, here's a short tutorial on how to make a square knot bracelet - the easiest and most simple kind.

1. First, you need to cut your hemp string to the right length. You'll need two strings, one long piece at 80 inches and one short piece at 35 inches. I have a larger wrist (about 7 inches around), but it's better to have too much than too little. Eventually you will know exactly how much you need so you don't waste your hemp.

2. Then you have to find the middle of each string and tie a knot, making sure it's the right size for the bead you want at the end.

3. Now that you have it started I recommend using a clipboard to hold it still. Then you can start your knots. It can be a little tricky to get the swing of things when you're first learning, but halfway through you'll probably be a pro!

And to try and give you an idea on how it goes, my lovely illustration!


4. Hopefully you can see it, but basically your two short pieces hang down the middle.

5. Then you use your long pieces to tie the knots around them.

6. One long piece goes over top of the short middle pieces (above: the red one), then under the other long piece (above: the blue one). And you pull them tight until there is a knot. Now you switch it; the blue one goes on top and the red one goes under. Repeat.


7. Once it's your desired length you pull all four strings through your bead, and tie a tight knot right up against your bead so it doesn't come off. To make sure your knot never comes undone I recommend putting some epoxy glue on the knot.
 

8. Now you can cut off the excess string, leaving about 5 mm to 1 cm. And you're done!

Making hemp jewelry can be really fun, especially once you start adding beads, charms and pendants and exploring different colours.

I hope this was easy enough to understand and that you can make your own square knot hemp bracelets now!

Thanks,

Saturday, December 22, 2012

2013 Printable Calendar

FREE 2013 PRINTABLE CALENDAR


2013 Printable Calendar
Feel free to save and print my calendar. Each month features a photo taken by me.
Designed to be printed as a 5 x 7, would look good in a picture frame either on a desk or table top, or mounted on the wall!

Wednesday, December 19, 2012

Inspiration Through Another's Art

I am super excited because the print I ordered arrived! The reason this print is so important to me is because it's a reminder to follow my dreams. I've put it up on my gratitude board and can read it over and over again.

It's a print of an original mixed media art piece done by Mandy Thompson. You can purchase her art from her Etsy shop: Mandy Thompson Art. The words written on it are from The Artist Manifesto by Jeff Goins.


Thanks,

Friday, December 7, 2012

Putting My Photography Out There


It's important for people to have hobbies/interests. In fact I have many but one of my favourites is photography. 

I consider myself a self-taught, amateur photographer. I would love to take a class or course, because learning can sometimes be faster and easier in a class setting. I mean, you have to put the time in and learn the exercises when you are in a class but at home I often get distracted by things that need to get done over the things I would rather be doing.

Anyway, that aside, I do take the time every now and then to go out with my camera and shoot some pictures. And since I secretly wish I could be a professional paid photographer I decided to make a Facebook page to show off my work to friends and acquaintances. This is an idea that is terrifying to think about it. I've never been the type to put my work out into the world to see. Which is exactly why I started that Facebook page, and exactly why I started this blog. You know, forcing myself out of my comfort zone. 

So maybe if you aren't too busy you could check it out, too?


Thanks, 

Friday, November 30, 2012

Fitness Fridays, And Photography


Moving Train - Cole's Photography


Okay, can I just come up with a reasonable excuse as to why I didn't do so well this week? 

I had the flu, and didn't feel completely better until Wednesday. It really put a damper on my plans.

However, after that whole ordeal I did start eating breakfasts in the morning (so it’s only been three days…) and I have been going for walks.

I actually switched it up. 

Instead of extending my walk home from dropping Sidney off at school I decided to kill two birds with one stone and go for walks and work on my photography! On Wednesday I walked through Riverside Park, and yesterday I walked around my neighbourhood, taking pictures of anything that looked interesting enough. My boyfriend Nick was telling me about this abandoned nursery (like a flower  nursery?) and I figured that would be another great place to take pictures. So if I have the time today I want to go there and walk around. Otherwise, I’ll have to settle for a boring walk around the neighbourhood again and hit up the nursery another day.

It takes me a lot of energy to motivate myself. Sometimes when I don’t want to do something, like go for a walk, I have to make it more fun and interesting. I found that bringing my camera along does just that and therefore inspires me to want to go out! 

Some people like going with a friend, 
walking a certain trail or 
listening to their iPod. 

Not me. 
I like solitude, 
silence,
and fresh scenery. 

So, I’m sure I will continue this routine into the next week. 

As for my breakfasts… Well, on Wednesday I had a Muffet with milk and orange juice. Yesterday I had a bagel with cream cheese and I know that’s not the healthiest option but I really don’t care for most breakfast foods. Today I had a Bolthouse smoothie, which is just a fruit smoothie that comes already made from the grocery store. I’ll do better next week, for real. 

Now, I don’t feel comfortable enough in my two new routines to add another. Like I said, I was sick for half the week so I am going to stick with this for another week and hopefully next Friday I will tackle the more difficult tasks. Eeks!

Thanks, 


Related Posts Plugin for WordPress, Blogger...
 
Blog Design by Likely Lola